Tuesday, March 24, 2015

Mouse Pincushions

I always say my patronus would be a mouse, and so recently in need of a new pincushion, I decided to make it in the shape of a mouse.  I didn't have a pattern, and though I love this and this and this, I wanted something simpler.  Having made tetradhedral pincushions before, I decided to make something more like this.   I got a bunch of crushed walnut shells from Amazon pet supply to fill it, and decided while I was at it to make one for my mom too.


My favorite part is the tails!  Normal mice don't actually have tails that curl around quite like this, but I couldn't resist.  I just knotted embroidery floss like we used to for friendship bracelets, but did it around florists wire so it holds a shape.


Hooray for fun little projects!

Monday, March 16, 2015

Puppets for Anna

Anna just turned 3 (I still cannot believe this), and I decided to make her some puppets.  I followed the basic plan outlined here.  Her instructions and pattern pieces were clear and easy to use, but I don't think I'd make them this way again.  I'm not crazy about things that have to be glued, so I think instead of plastic in the mouth piece I'd use some sort of sewable heavy weight interfacing.  I used up some fabric scraps I had lying around, and in retrospect I probably should have used something sturdier like fleece so I wouldn't have needed to line them.  In spite of not being my favorite project ever, I think they turned out cute enough and hopefully Anna will enjoy playing with them!


Mike took a couple of pictures of me talking with the mouth puppets :)  It's hard to deny that puppets are pretty entertaining! 


Friday, March 13, 2015

SAQA Auction Quilt

It's time once again to make small 12 x 12 quilts for the SAQA auction.  I love trying things a bit different for this, often in preparation for a bigger quilt, but this time it turned out the be the other way around- I did the big quilt first, and am now using up leftover bits for the auction quilt.

I haven't blogged about the bigger quilt though, since it was for a show with rules about that, so it's all new here!  For these smaller quilts, I started with two pieces of already quilted fabric that had been trimmed off of the bigger quilt during the squaring up.  It's kind of hard to see in the first picture, but if you look at the second picture, you can see it's two different pieces.  Since they were already quilted, I attached them together using bias tape.  I had enough of these quilted pieces to make three small quilts, and each one is slightly different.

To back up a little bit, both the top and bottom sections started as white polyester fabric that I painted with latex house paint in blue-grey-purple.  The pieces were then quilted (again all as part of something much larger), the bottom to look like plank flooring and the top in some random fillers meant to feel like wind and the outdoors.  Of course since they didn't make bias tape in the right color, I had to paint it too.

For these smaller pieces, I then designed my composition in illustrator (that's my silhouette looking out the window) and printed it on freezer paper.  I then quilted around everything in the picture (window frames and person), and tore off the paper.


Next, I used my silhouette cutter to cut the silhouette of the person out of adhesive foil so I could use it as a stencil.  I used my silver, blue, purple, and black Shiva paintsticks to shade in the silhouette and then removed the foil.


Next I mixed up some more of my latex paint and painted in the window frames in a darker shade than the background.  In the picture just below you can see the stitched outline of the window frame and then in the subsequent picture you can see I've painted it purple.  It didn't really matter about going over the lines into the window because as you can see in the third picture, my last step was to cut out the window panes to give an openwork feel.  I sealed the cut edges with my soldering iron so there'd be no fraying (thus the polyester fabric).


Here they are all faced and finished, one will be donated to the SAQA auction and the other two will just be for sale.  Thanks to Mike for taking the pictures.  It was fun to use up the extra bits cut off from another project and I'm anxious to show you guys the bigger quilt in a few months!  My goal was for the pieces too evoke thoughtfulness and reflection.  Maybe hopefulness or calm, or even anxiety or sadness.


Linking up with Nina-Marie as always!

Monday, March 9, 2015

Melissa's Quilt

Mike's daughter Melissa and son-in-law Kyle use this quilt on their bed, and unfortunately one of their dogs ate it.  They brought it to me to try to fix, always a fun task.  I think Kyle's grandmother made it for them; sometime in the seventies I'd guess.  It's made entirely out of polyester double knits and not assembled with particular precision, but has fabulous bright colors.  The back is some sort of cotton poly blend.  Anyway, they didn't want me to just cut off the bad rows and re-bind because it wouldn't have been big enough for their bed. Since I don't have any fabric remotely like this I could have used to patch it, I decided to just remove the binding from the very bottom row, then remove the row itself.  That way I could use the intact squares from the bottom row to fill in the areas in the next two rows where the dog chewed it up.  Several of the individual squares outside the obviously messed up area were also chewed so I wound up patching or replacing several of them.   I removed the ties, backing and batting from under the whole three rows that had been messed up, replaced them, retied the squares, and then rebound.  I think it turned out ok!  The yarn wasn't quite exactly the same shade of bright pink, but it's as close as I could get and I think once Melissa washes it a couple of times it'll soften out.   Hopefully her dog won't eat it again.


Friday, March 6, 2015

Seed Packets V2-Help Needed

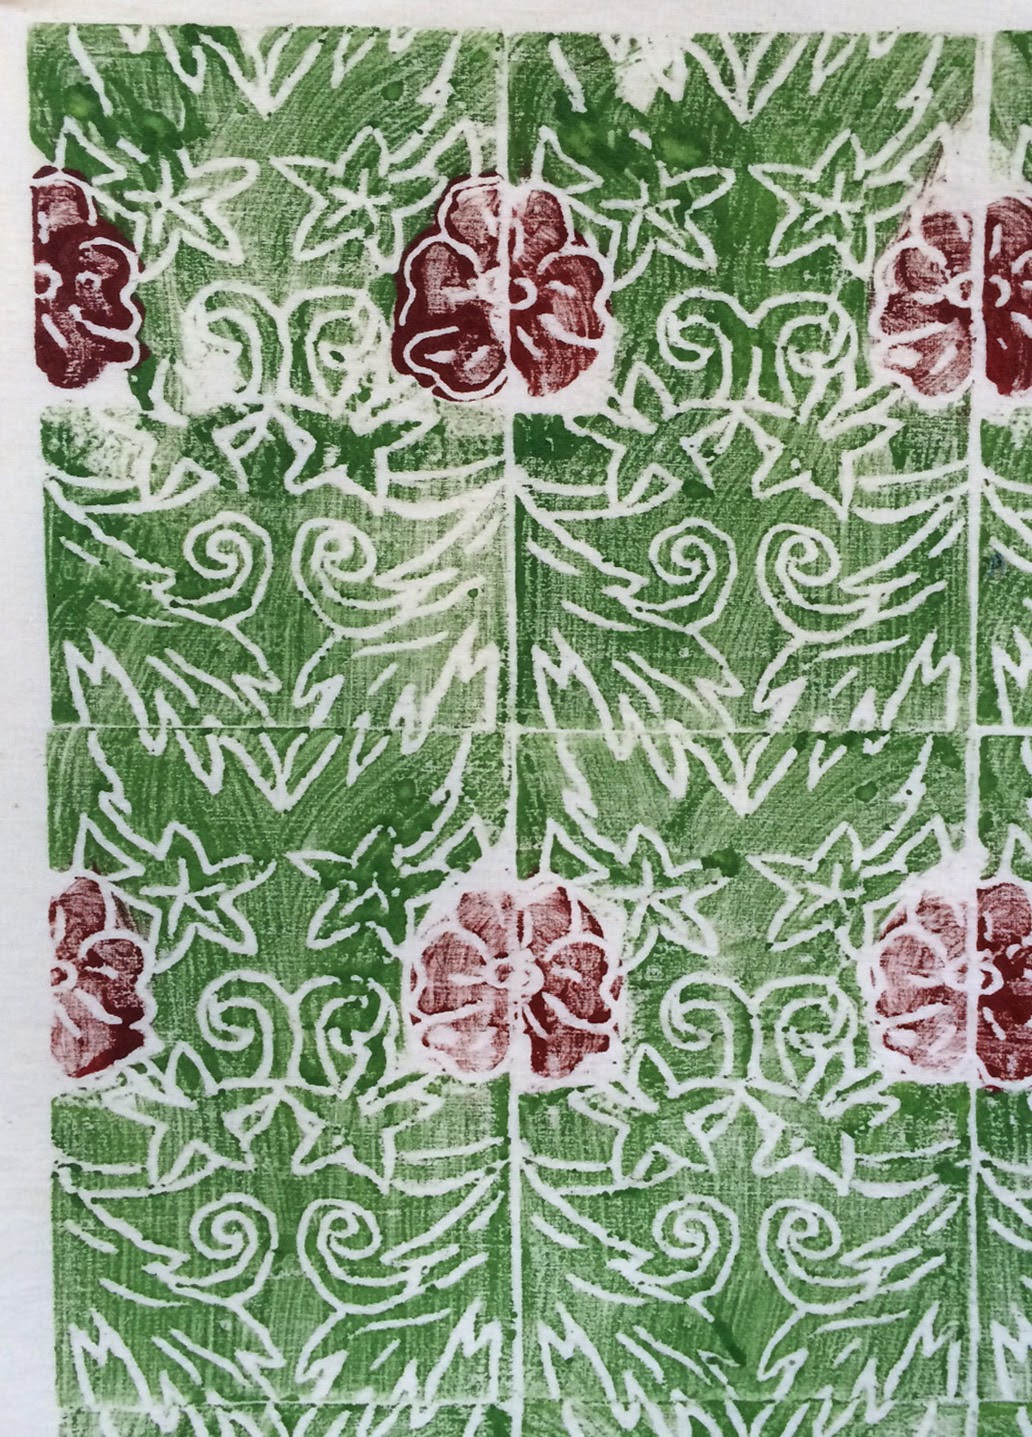
I mentioned last week that my mom and I did a couple of new technique mini-projects over the holidays (BTW, how is February already over??).  The first was the painting technique I already shared, and the second one was making stamps out of meat packages.  This was also an idea from a magazine, but alas I've forgotten which one.  We cut out flat sections from foam meat trays and used a pen or pencil to carve into them. Mom did the two on the left and I did the one on the right. I really love tiling designs, so tried to make a pattern that would repeat across the edges of each print.

We were somewhat limited by the amount of meat tray that didn't have other stuff already imprinted on it.  We tried to get the men to get us some more meat trays while they were suffering through the holiday-grocery-store-nightmare, but our small town walmart didn't have any meat trays without meat on them and no one needed any more meat, so we just went with what we had.


After "carving" them, we just used regular acrylic paint to make prints.  Here's a strip of test prints from one of mom's.  Her second block (the flowery one) made a really nice repeating design but I didn't get any pictures of it.  


I started printing mine to make a 16" square, with our 16 x 16 seed packet challenge in mind.  I didn't have quite enough green mixed up, so my first panel wound up have lots of different shades of green.  We also weren't quite sure how much paint to use, so some prints were globbier than others.  I kind of like the variation in green but not the globbiness.  Anyway, I was gamely printing along, then got to the last row and ACK printed one of them upside down.  I could have screamed.  I finished up the pattern, then just printed another panel.  The second time, I mixed up extra paint so I had more uniform colors and I managed to print them all in the correct orientation.


First panel

Second panel

Here are a couple of close ups so you can see the repeat a bit better.


So here's where I  need help.  I have absolutely no idea what to do with these (either one or both).  I thought about using them as a background for something else, but what?  They're pretty busy.  I thought about just quilting them and finishing them as a whole cloth, but I have no idea how I'd quilt them and I feel like they'd be a bit flat.

Any suggestions?  I really have no idea at all!

Linking up with Nina-Marie as ever!


Thursday, March 5, 2015

Embroidered Necklace

Do any of you read MrXStitch?  It's a contemporary embroidery blog that features all kinds of fabulous contemporary stitching.  A few weeks ago they featured an embroiderer from Chile named Sara, and I just absolutely fell in love with her work.  She sells through an Etsy shop called Casatienda de Amelia B.  She agreed to make me one of her mini-rosita necklaces in a custom colorway, and I just got it yesterday.  I love it and wanted to share it, especially since she was wonderful and prompt to work with.  I love the sparkle that comes from the little bits of metallic thread and sequins.  If anyone is looking for some great embroidered jewelry, definitely check out her shop.